
Yogyakarta is one of the famous production centers for batik, isn’t it?
I was thinking of buying some batik as a souvenir…


Yogyakarta is indeed one of the famous production centers for batik.
How about making your own batik as a souvenir while you’re sightseeing?


In this article, I will introduce in detail the batik-making experience you can have in Yogyakarta.


What is Batik?
On October 2, 2009, Indonesian Batik was recognized as a Masterpiece of the Oral and Intangible Heritage of Humanity
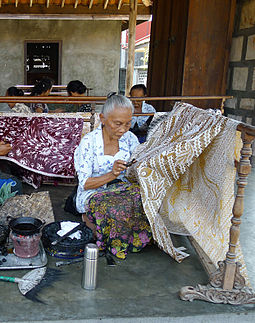
Indonesian batik is a world-famous traditional cloth that is hand-dyed and features beautiful patterns. This fabric is one of Indonesia’s important cultural heritages and is highly valued worldwide. The art of batik has been passed down for centuries and is still loved by many people today.
The History of Batik
The history of batik dates back to the time of the ancient Javanese kingdoms. At that time, batik was often given as a gift by the nobility, making it a very expensive item. Later, batik became a more common fabric, with production flourishing especially in the central region of Java. The patterns of batik are inspired by the local culture, religion, and nature, and each pattern has a deep meaning.


Batik Today
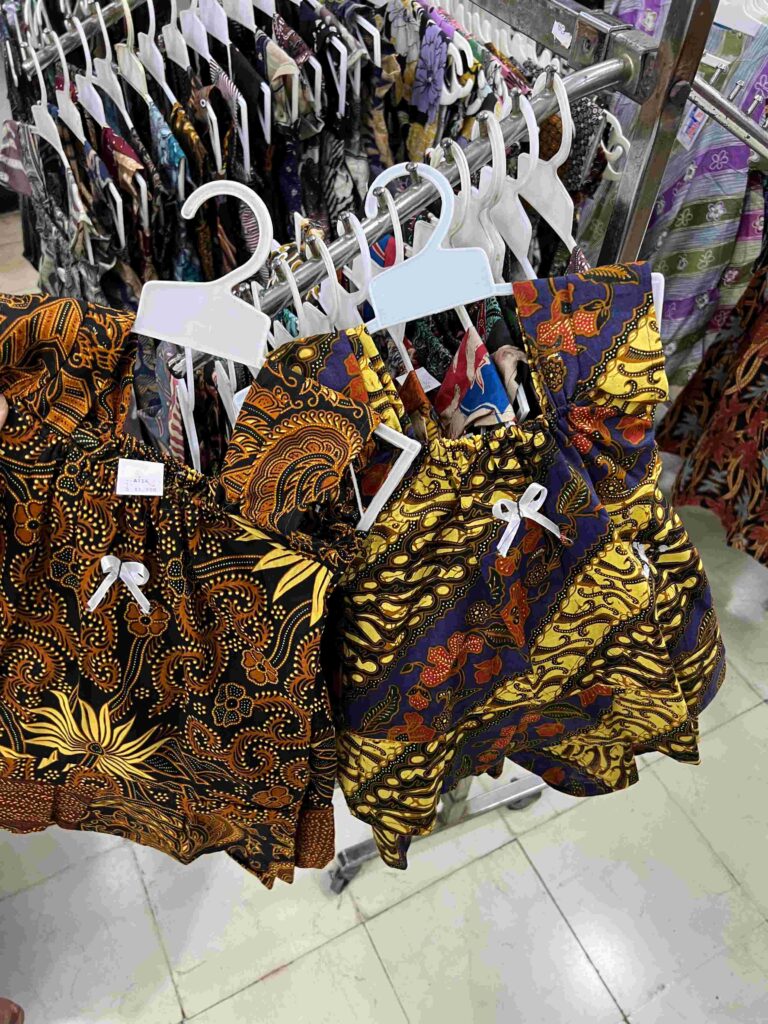
Today, batik is widely loved as Indonesia’s national dress and is also popular as a fashion item. Many designers have released collections that incorporate batik, and its beauty and charm are spreading worldwide.


I have a friend who owns a batik shop in Indonesia.
You can also buy online, so please take a look.
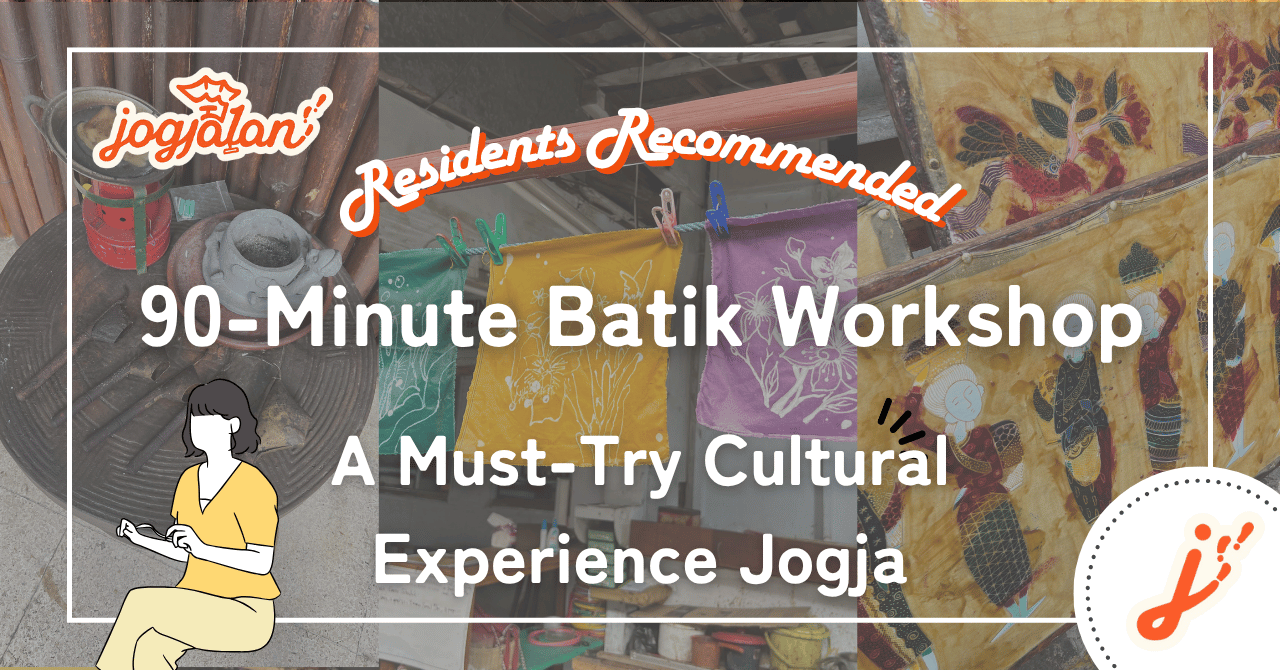
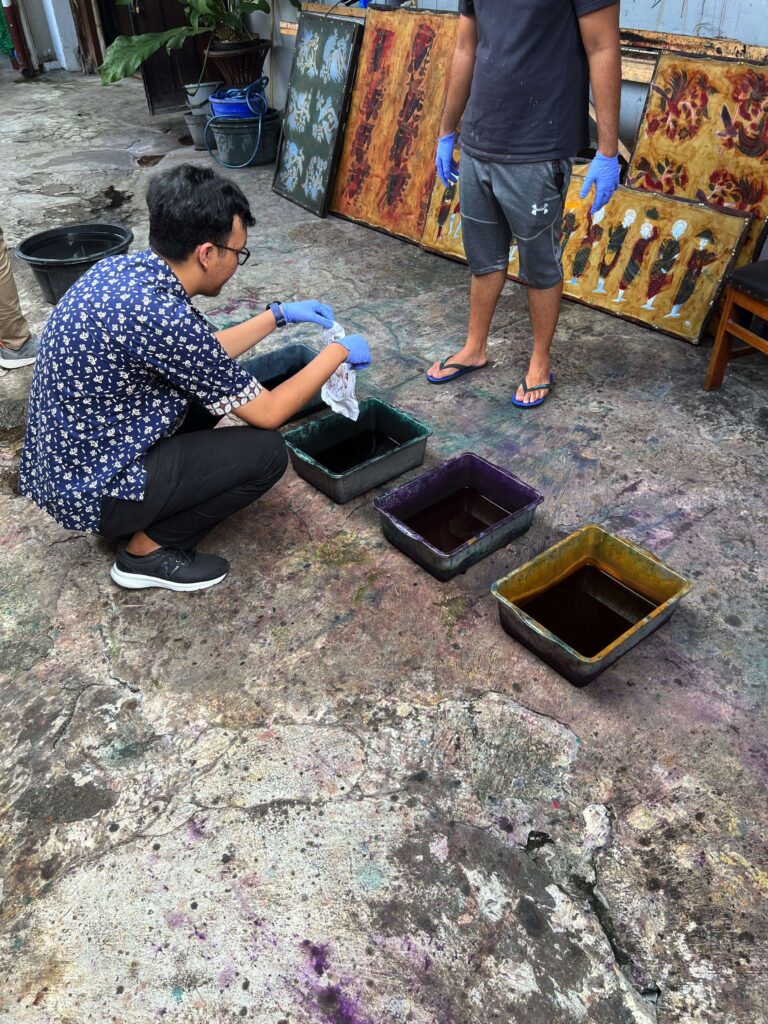
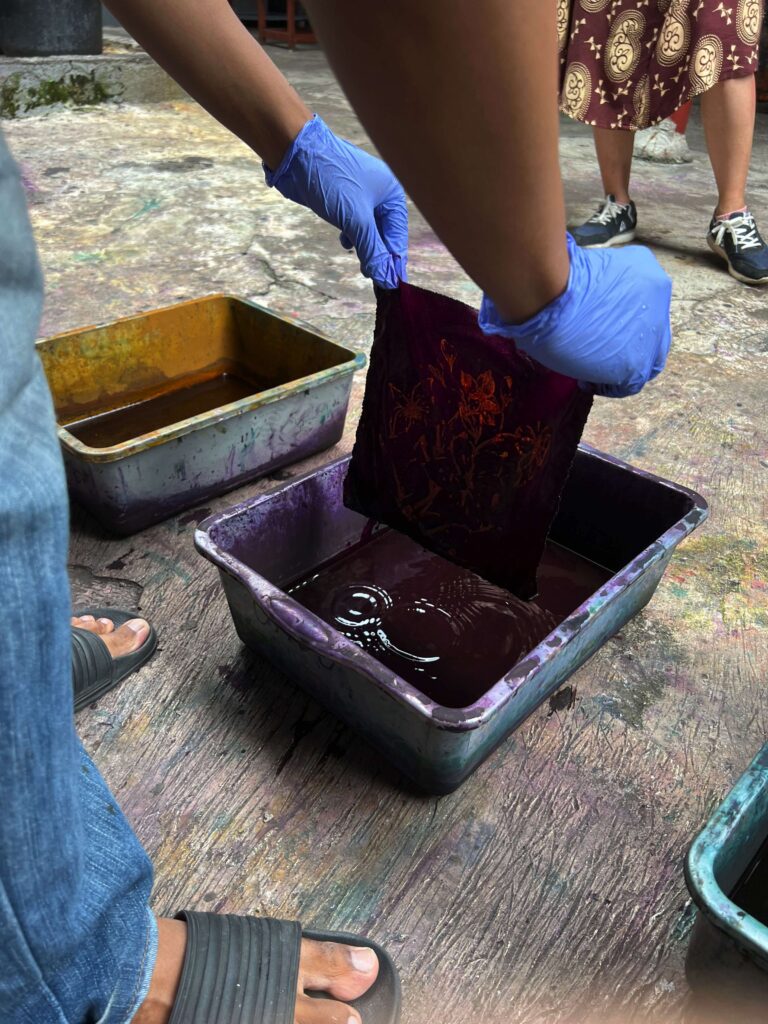
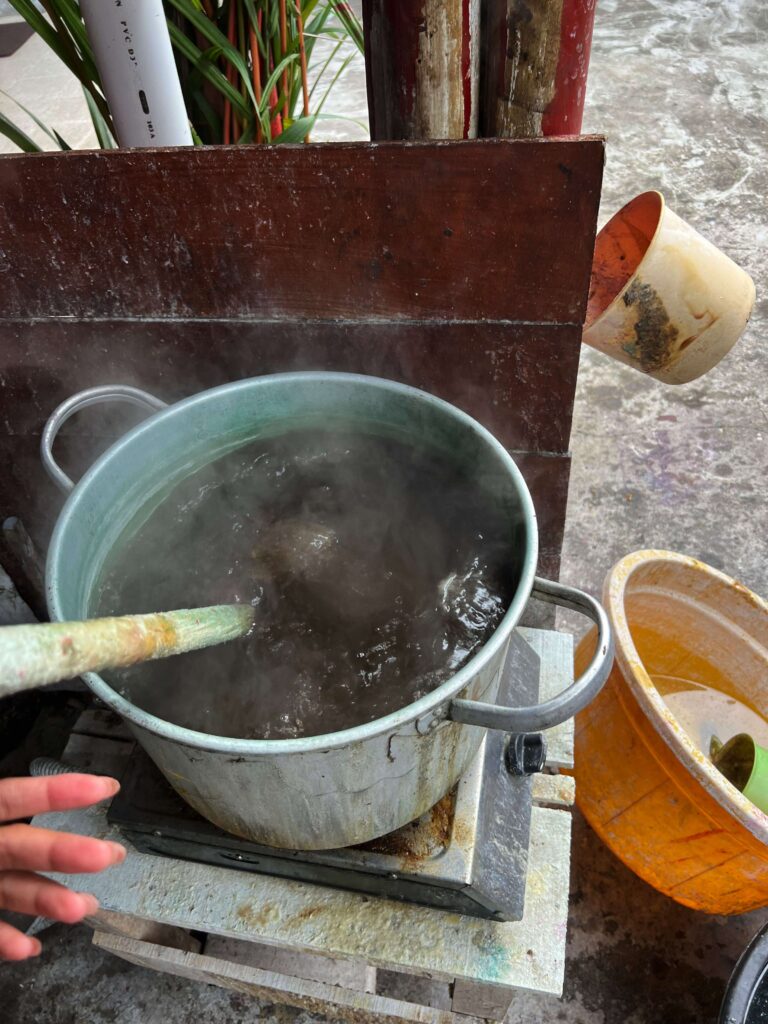
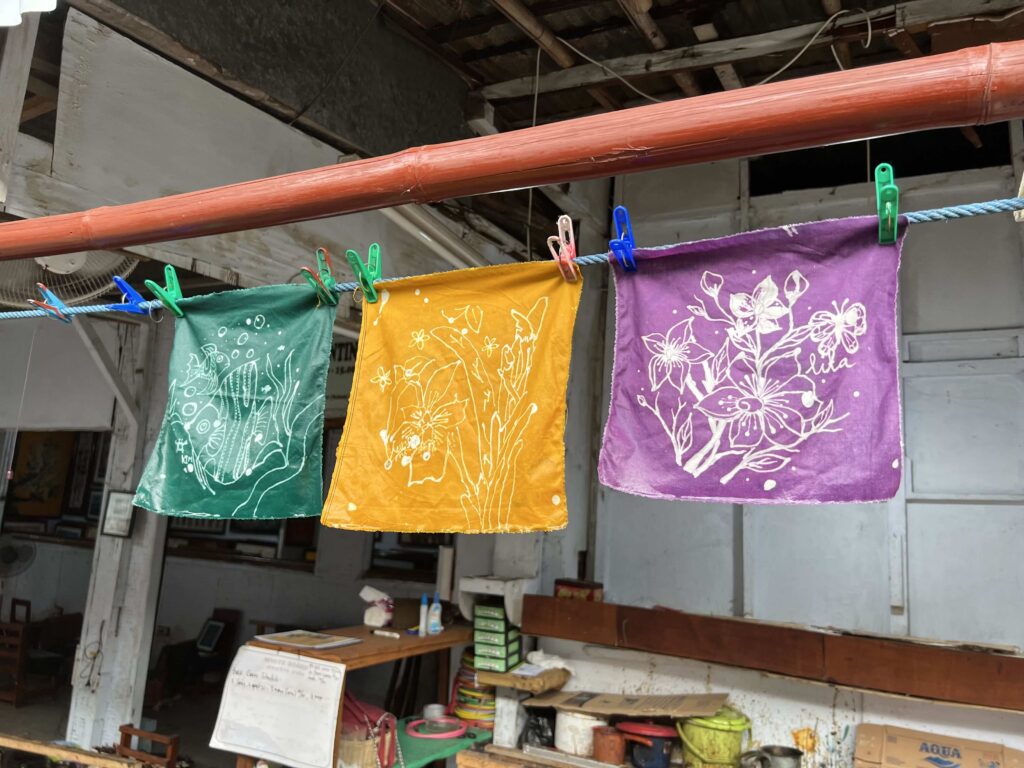
In this article, I will introduce in detail the batik-making experience in Yogyakarta, one of the famous production centers for Indonesian batik. For those interested in batik or Indonesian culture, this article will be a very useful source of information.
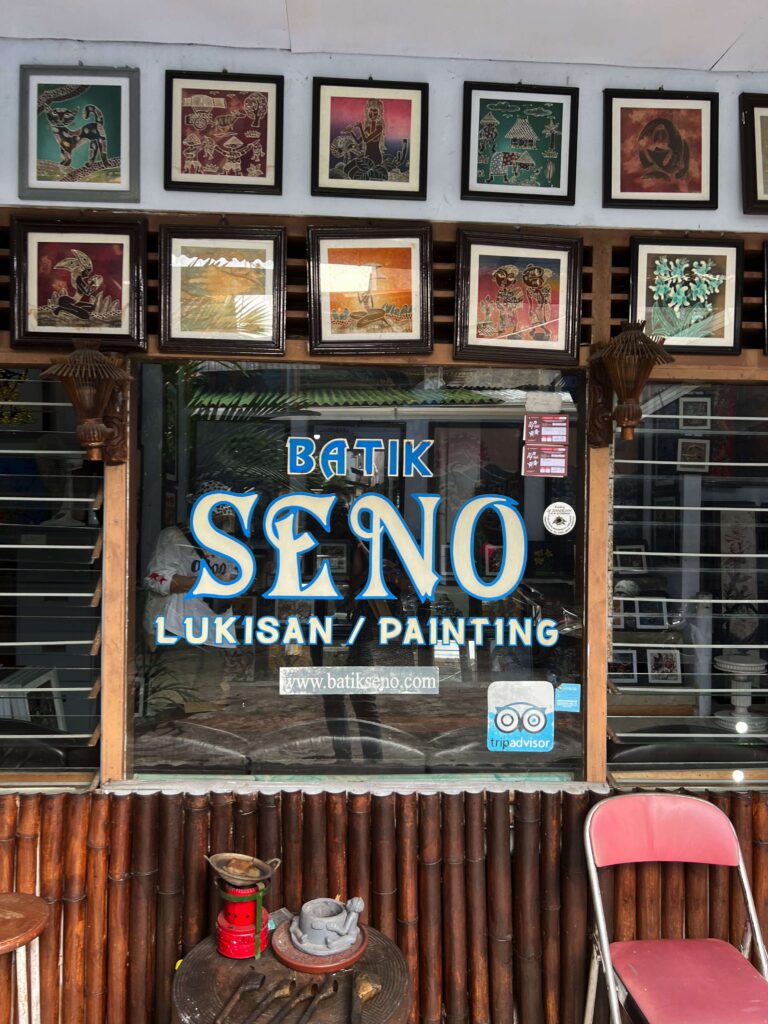
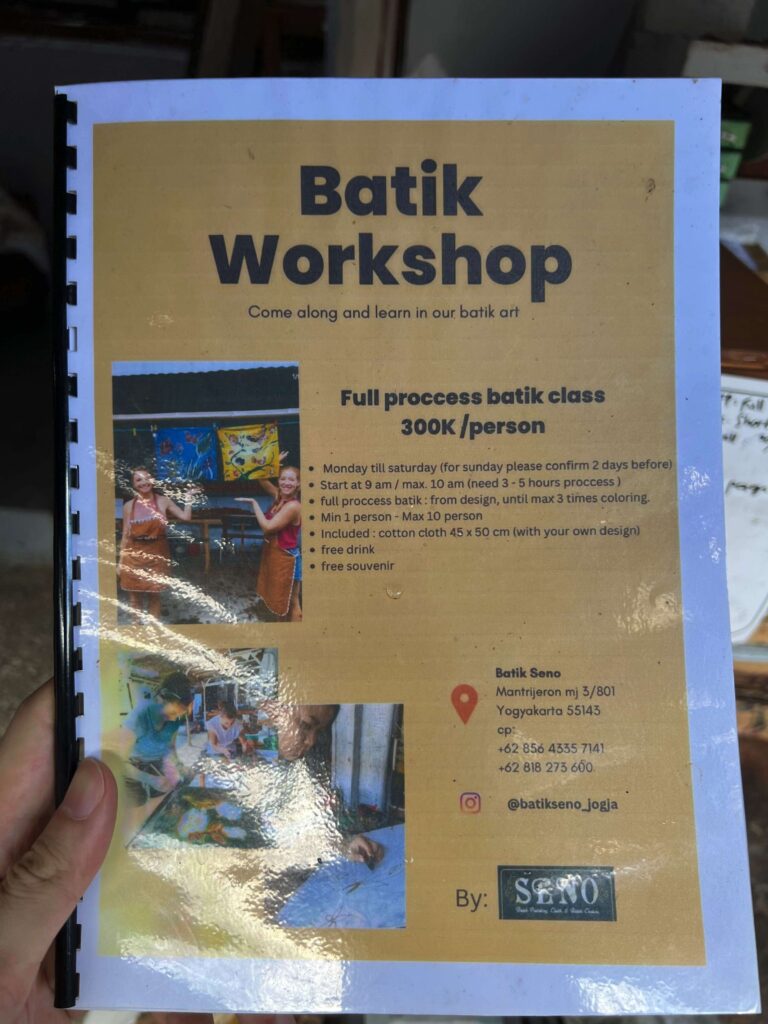
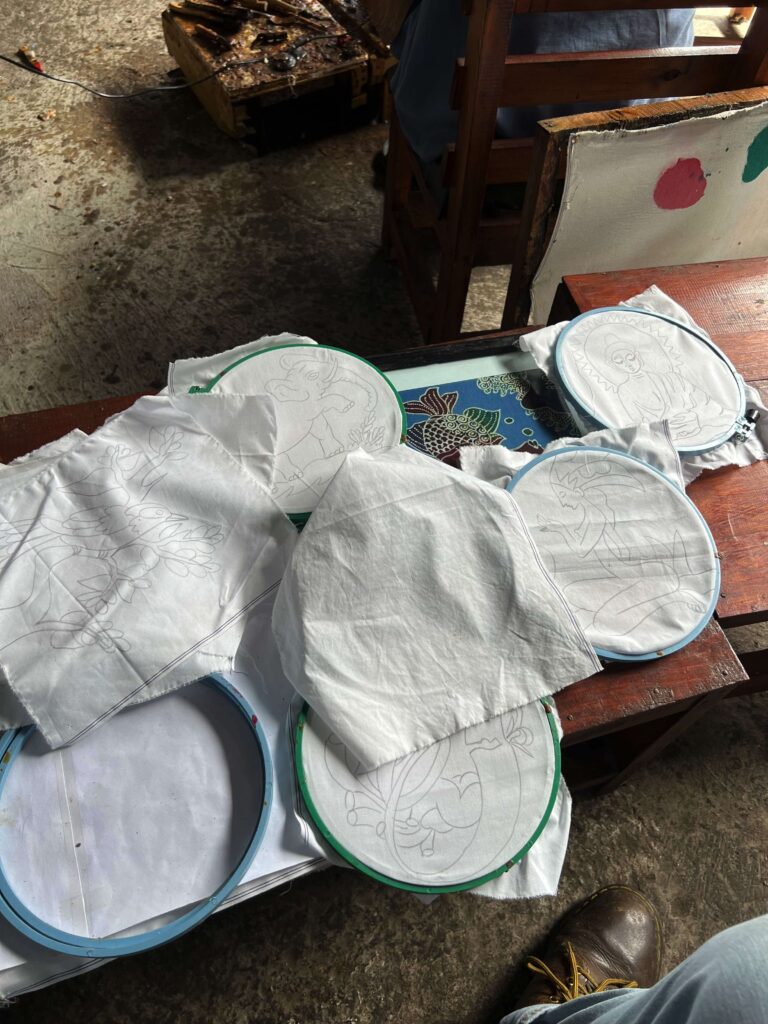
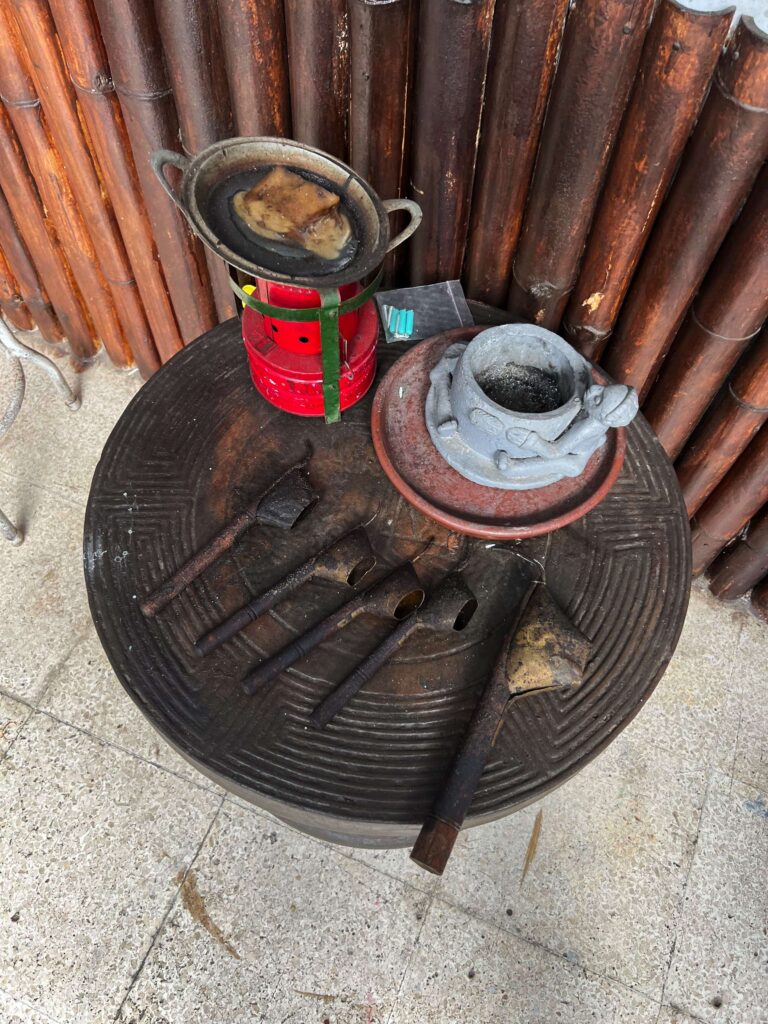
The Place Where I Experienced Batik Making!


I experienced a one-and-a-half-hour batik course at “BATIK SENO,” located in the southern area of Yogyakarta.
Looking at the Google reviews, it seems that many people other than Indonesians use this place, and indeed, the explanation was given in English and was very thorough.
There are many workshops in Yogyakarta where you can experience batik making, but this is a highly recommended one, so please visit.
Courses & Prices
This batik workshop offered three types of courses.


1.5-Hour Experience Course
This is a course where you can experience two processes: drawing with wax on a 25cm x 25cm handkerchief-sized cloth and one round of dyeing.
Price: IDR 75K
Duration: 1.5 – 2 hours
2-3 Hour Experience Course
A course where you can experience the processes of drawing with wax and two rounds of dyeing on a 30cm x 30cm cloth.
Compared to the 1.5-hour course above, you can use two colors, allowing you to create a more attractive piece.
Price: IDR 200K
Duration: 2 – 3 hours
Half-Day Full Process Experience Course
This course allows you to experience all the processes of batik on a 45cm x 50cm cloth.
Price: IDR 300K
Duration: 3 – 5 hours (some people take more than 2 days)
Details of the 1.5-Hour Experience Course
This time, I participated in the 1.5-hour experience course. I’ll introduce in detail what processes I was able to experience.
STEP 1: Choosing a Design


You choose your favorite design from a selection of cloths that already have a sketch on them.
Of course, you can also choose a blank one or add your ownアレンジ to the sketch.
STEP 2: Creating the Pattern with Wax


You apply wax to the sketch you chose in STEP 1.
This waxed area will be the part that is not dyed later on.


This step is actually quite difficult…
It’s not just about drawing a picture, but also about the distribution of the wax amount and temperature control. If you get these wrong, the wax will drip.
Basically, everyone drips wax somewhere on their first try, so don’t worry about it…
Many people incorporate the dripped wax into their design by turning it into a polka dot pattern.
A special tool shown in this picture is used to apply the wax.


STEP 3: Dyeing


You dip the waxed cloth from STEP 2 into the dye.
Then, the areas other than where the wax was applied will be colored.


STEP 4: Removing the Wax with Hot Water


Finally, you remove the wax by soaking it in hot water.
STEP 5: Drying and Finishing


This time, I went with a friend who was visiting from Jakarta. It’s so much fun to cover for each other’s mistakes and have a great time with friends through experiences like these.
We chose different colors, so it looks great even when it’s just hanging to dry.
Finally
Thank you for reading to the end.
This blog features many other articles about tourist information in Yogyakarta.
Please be sure to check out our other articles as well.
-
Candi Mendut Temple Guide: Highlights, Tickets, and Travel Tips
-
Roro Jonggrang Show at Prambanan Temple: A Must-See Cultural Performance in Indonesia
-
Waroeng SS: Yogyakarta’s Famous Spicy Restaurant Loved Across Indonesia
-
What Is Kopi Jos? Discover Yogyakarta’s Most Unique Coffee Experience
-
Wagokoro: The Best Japanese Restaurant in Yogyakarta You Need to Try
-
Top Japanese Restaurants in Yogyakarta Recommended by Japanese Expats
-
The History of Yogyakarta: Indonesia’s Royal City and Its Role in Independence
-
Ride the Scenic Gondola at Timang Beach, Yogyakarta – A Local’s Top Pick
-
Pantai Wediombo Beach Guide: How to Get There, Where to Eat & What to Do in Yogyakarta
-
Best Affordable Lobster Restaurants in Yogyakarta You Must Try
-
Filigree Silver Workshop in Yogyakarta: Experience Traditional Indonesian Craftsmanship
-
Traditional Silver Filigree Jewelry from Yogyakarta, Indonesia